How to Teach a Child to Color Inside the Lines Without Pressure
How to Teach a Child to Color Inside the Lines Without Pressure
Many parents notice that when children start coloring, crayons move quickly, colors go beyond the outlines, and areas may blend together.
Parents may be tempted to say, “Slow down,” “Stay inside the lines,” or “Let me show you how to do it properly.”
However, coloring inside the lines is a skill that develops gradually. It requires hand control, visual attention, patience, and practice. Young children are still learning to hold crayons, control pressure, change direction, and stop their hand at the right time.
The most effective support is to make coloring easier, more enjoyable, and appropriate for the child’s current ability, rather than focusing on neatness.
This guide explains how parents can encourage coloring control without adding stress.
First, Understand What “Coloring Inside the Lines” Requires
While coloring inside an outline may seem simple to adults, it requires children to coordinate several skills at once.
The child needs to:
- Look carefully at the picture
- Notice where the outline begins and ends
- Hold the crayon or pencil comfortably
- Move the hand in a controlled direction
- Adjust the movement near an edge
- Use suitable pressure
- Stay interested long enough to complete the area
- Correct the movement when the crayon leaves the space
These skills develop over time.
A toddler may understand that a picture shows a cat, but still be unable to control the crayon within the cat’s body. A preschooler may color large spaces successfully but struggle with ears, paws, flowers, or other small details.
Coloring outside the lines does not mean a child is careless or not trying. Often, their ideas develop faster than their physical control.
Is It Necessary for Children to Color Inside the Lines?
No. Children do not need to color neatly to enjoy or benefit from the activity.
Free scribbling and open-ended drawing are important parts of early creativity. They allow children to experiment with movement, color, pressure, and imagination.
Coloring inside the lines is one skill children practice as their control improves, but it should not be the main focus.
A child can create a meaningful, imaginative picture even when the coloring is uneven or extends beyond the outline.
Parents can support both types of activity:
- Free coloring, where there are no rules
- Guided coloring, where the child gently practices control
Balance is important. If every session focuses on accuracy, children may lose interest.
At What Age Do Children Usually Start Coloring Inside the Lines?
There is no exact age, as children develop at different rates.
Ages 1–2
Children at this age usually make large marks, dots, lines, and scribbles. They may color across the whole page without paying attention to the picture’s boundaries.
This is normal. At this stage, the goal is exploration, not accuracy.
Ages 3–4
Some children begin noticing outlines and trying to fill separate areas. They may stay inside large spaces for part of the picture, but often move outside the lines.
They usually do better with bold outlines and simple images.
Ages 5–6
Many children have more control and can work within medium-sized areas. They may still struggle with small or narrow sections, especially when tired or rushing.
Ages 7 and Older
Children may be able to color more detailed pictures, use different strokes, add shading, and work more carefully around edges.
These are only general patterns. A child may develop earlier or later, and that does not automatically mean there is a problem.
Related guide: How to Choose the Right Coloring Pages for Your Child’s Age.
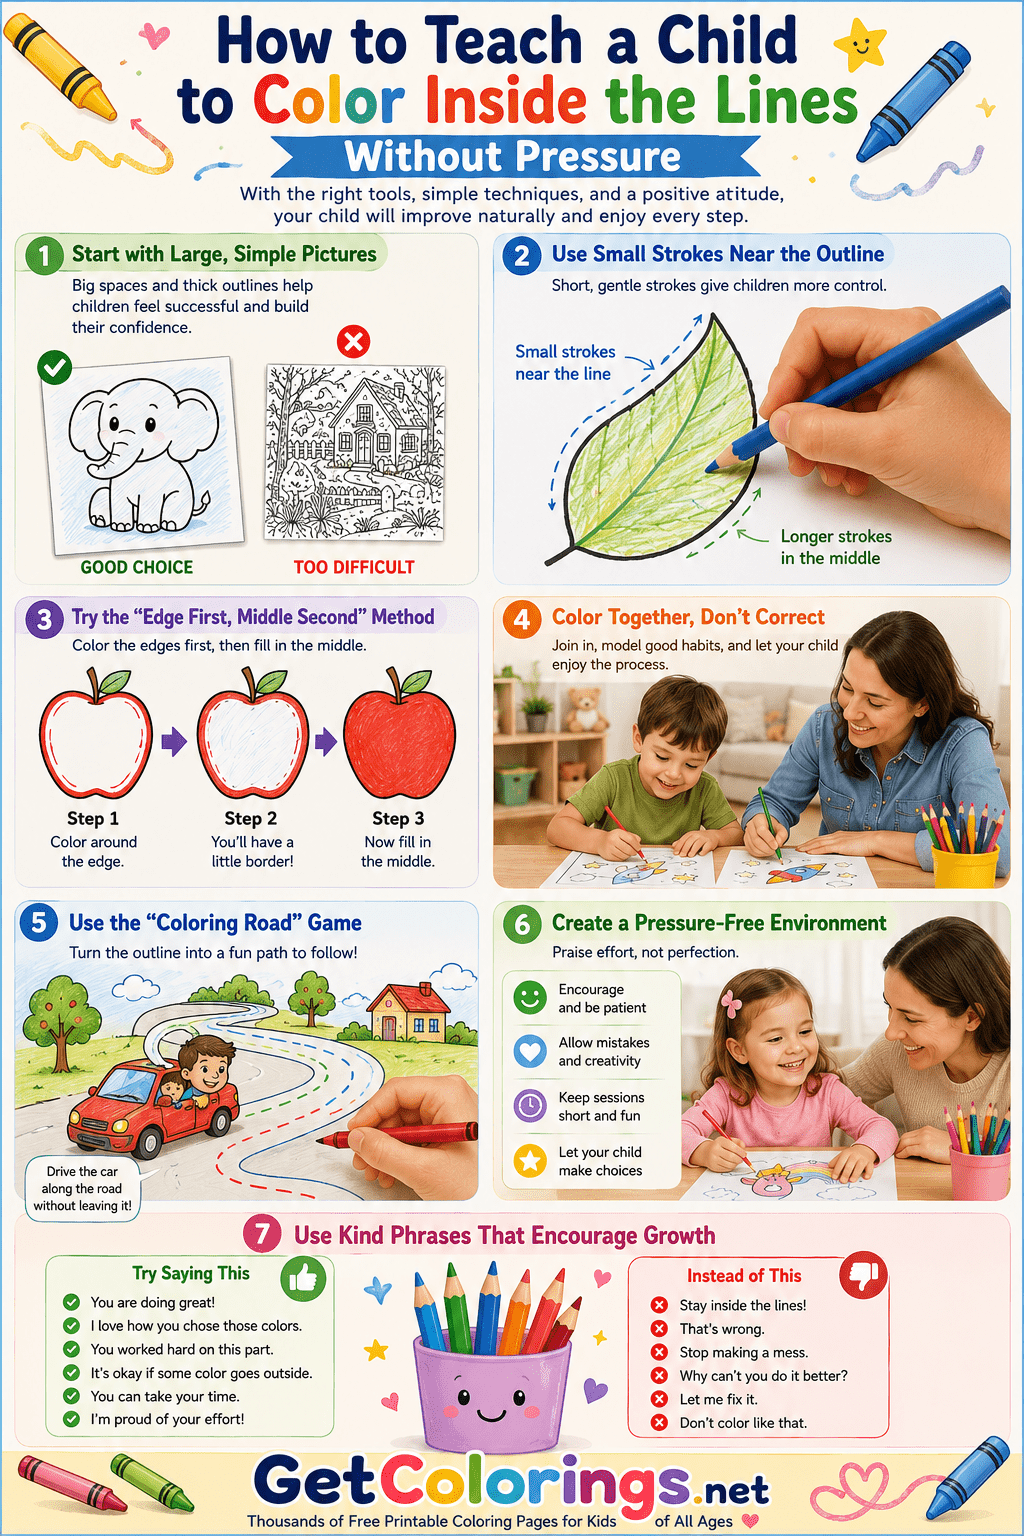
1. Start With Large, Simple Pictures
One of the easiest ways to help a child succeed is to choose a suitable coloring page.
Detailed pages with small spaces can be challenging, even for interested children. Starting with complex designs may cause frustration before the activity begins.
Choose pictures with:
- One large main object
- Thick, dark outlines
- Wide open spaces
- A few small details
- A simple background
- Familiar shapes
Good beginner subjects include:
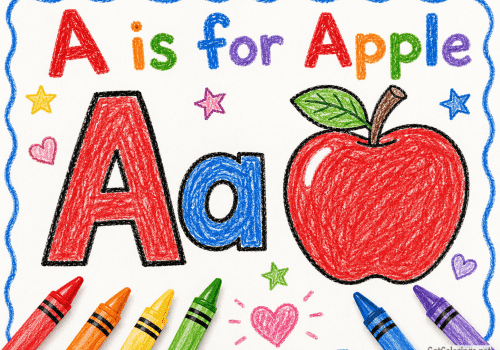
- A large apple
- A simple car
- A balloon
- A fish
- A flower
- A sun
- A teddy bear
- A large butterfly
A page with a single large elephant is usually easier than one showing an entire jungle with many elements.
As the child becomes comfortable, gradually introduce smaller spaces and additional details.
2. Use Thick Crayons or Short Colored Pencils
The size and shape of coloring tools can greatly affect a child’s control.
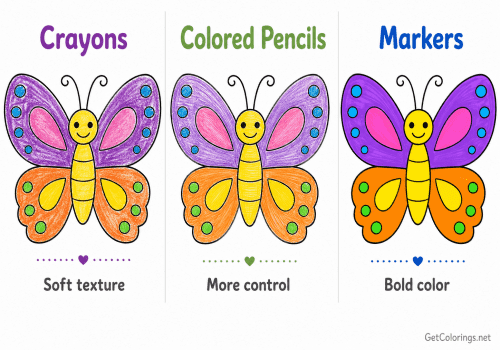
Very long or thin pencils may be difficult for small hands to control. Thick crayons, triangular crayons, or short colored pencils are often easier for young children to hold.
Suitable tools include:
- Thick crayons
- Triangular crayons
- Short colored pencils
- Washable markers with broad tips
- Easy-grip pencils
Shorter tools may encourage children to use their fingers rather than their whole arm.
Avoid forcing a specific grip. Children naturally adjust how they hold crayons as their hand strength and coordination develop.
Instead of repeatedly adjusting the child’s grip, provide comfortable tools and allow natural practice.
3. Show the Child How to Use Small Strokes
Young children often use large shoulder or elbow movements, making it difficult to stop near the outline.
Parents can demonstrate shorter movements.
Place your own paper next to the child’s page and say:
“I’m using little strokes near the edge.”
Then show:
- Short back-and-forth movements
- Small circular movements
- Slower strokes near an outline
- Larger strokes in the middle of the space
Avoid guiding the child’s hand unless they ask for help. Completing the picture for them limits opportunities for independent practice.
Demonstrating is usually more effective than correcting.
4. Teach “Edges First, Middle Second”
Some children find it easier to color the edges of a shape first, then fill in the center.
You can explain this as a simple two-step method:
- Slowly color around the inside edge.
- Fill the larger middle area.
Use a large shape at first, such as a circle, heart, leaf, or balloon.
Parents can say:
“Let’s make a little border inside the shape. Then you can color the middle any way you like.”
Do not expect a perfect border. The goal is to help the child notice the outline and slow down near it.
Older children may call this method outlining or edging.
5. Encourage the Child to Slow Down Near the Lines
Children often color quickly because speed feels exciting. Instead of telling them to color slowly everywhere, teach them to adjust their speed based on the area.
A simple rule can be:
- Faster in the middle
- Slower near the edge
You can compare it to driving:
“The middle is an open road, but near the line we slow down.”
Keep explanations playful. Children should not feel that coloring outside the outline is a significant mistake.
If the crayon crosses the line, continue without emphasizing every error.
6. Practice With Simple Shapes Before Detailed Pictures
Before working on animals, people, or complex scenes, children can practice with large basic shapes.
Draw or print:
- Circles
- Squares
- Triangles
- Hearts
- Stars
- Large letters
- Wide stripes
Simple shapes help children understand boundaries by reducing the number of details to manage.
You can also create simple activities:
- Color each circle a different color.
- Fill one large square with short strokes.
- Color around the edge of a heart.
- Use two colors inside a large star.
- Color alternate stripes.
Keep these activities brief and optional. They are not worksheets that require perfect results.
7. Make the Outlines Easier to See
Some coloring pages have thin or pale outlines that are difficult for young children to follow.
You can make a page easier by:
- Choosing images with thick black lines
- Printing at a larger size
- Tracing the outline with a dark marker
- Removing unnecessary background details
- Cropping the image to focus on one object
- Increasing print contrast
For very young children, bold outlines provide clear visual boundaries.
Some parents also outline the shape with a raised material, such as fully dried glue. This can create a physical edge that the crayon can feel.
Always use child-safe materials and supervise the activity.
8. Try a “Coloring Road”
Turn the outline into a playful path.
Choose a large shape and explain that the crayon is a car. The child’s task is to drive close to the road without leaving it.
You might say:
“The black line is the side of the road. Can your crayon drive beside it?”
This activity helps children focus on boundaries without using negative terms such as “wrong,” “messy,” or “bad.”
Other playful ideas include:
- A train following a track
- A boat following a shoreline
- A bee flying around a flower
- A rabbit following a garden path
Playful instructions are usually less demanding than direct corrections.
9. Let the Child Color From the Outside In
Another technique is to begin near the outline and gradually move toward the center.
For a large leaf, for example, the child can:
- Color one side near the border.
- Color the opposite side.
- Fill the center.
This reduces the chance of reaching the edge too quickly.
Some children prefer the opposite method: coloring the center first and carefully finishing the edges later. Both approaches are acceptable.
Let the child discover which method is easier.
10. Use Stickers or Dots as Stopping Points
Small visual markers can help children notice where a section begins and ends.
Place removable dots or small stickers near the inside edge of a large shape. Ask the child to color between the markers.
For example:
“Color from this dot to that dot.”
This breaks a large task into several smaller, manageable steps.
Avoid using small stickers with very young children, as they may pose a choking hazard. Always supervise closely.
11. Choose a Subject the Child Truly Likes
Children are more likely to slow down and pay attention when the picture interests them.
Ask what they would like to color:
- Animals
- Dinosaurs
- Cars
- Space
- Flowers
- Sea creatures
- Robots
- Sports
- Castles
- Food
- Trains
- Nature
A child who enjoys trucks may spend more time on a simple truck page than on a more educational image.
Interest often enhances attention more effectively than repeated instructions.
12. Color Together
Children often learn by watching adults.
Print two copies of the same picture or select two similar pages. Sit beside the child and color your own page.
You can quietly describe what you are doing:
- “I’m filling the big space first.”
- “I’m using smaller movements near this line.”
- “I went outside the line here, but that’s okay.”
This reassurance is important. It shows children that mistakes are normal and do not take away from the activity.
Avoid making your picture a standard for the child to copy. If your page appears overly detailed or perfect, the child may feel their own work is inadequate.
Keep the approach relaxed.
13. Offer Help Without Taking Over
When a child says, “I can’t do it,” parents may want to finish the difficult parts for them.
Instead, offer several types of help:
- “Would you like a bigger crayon?”
- “Should we choose an easier picture?”
- “Do you want me to show you on my page?”
- “Would you like to color the big parts while I color my own picture?”
- “Should we take a break?”
Avoid completing the child’s page unless they specifically request it and you both agree to it.
Children gain more confidence by completing an imperfect section themselves than by watching an adult perfect it.
14. Keep Coloring Sessions Short
Extended sessions can cause children to become tired, impatient, or careless.
For younger children, five to ten minutes may be enough. Older children may enjoy longer sessions.
Watch for signs that the child has had enough:
- Pressing too hard
- Coloring very quickly
- Throwing crayons
- Complaining
- Leaving the table repeatedly
- Asking the adult to finish
- Losing interest in the picture
It is best to stop while the activity is still enjoyable.
The page can be finished later or left unfinished.
15. Avoid Correcting Every Mistake
Constant correction may cause children to focus on avoiding mistakes instead of enjoying the activity.
Avoid commenting every time the crayon crosses the outline.
Instead, notice effort:
- “You slowed down near that small part.”
- “You used tiny strokes around the edge.”
- “You kept working even when the shape was difficult.”
- “You chose a picture with lots of details.”
- “I can see how carefully you colored this section.”
Specific feedback helps children recognize their strengths without expecting perfection.
What Not to Say While a Child Is Coloring
Some phrases may seem harmless, but can make children feel judged.
Try to avoid:
- “You’re doing it wrong.”
- “That’s very messy.”
- “Stay inside the lines.”
- “Why can’t you do it like your sister?”
- “That color doesn’t belong there.”
- “You ruined the picture.”
- “Let me fix it.”
- “You need to try harder.”
- “Children your age should do better.”
Better alternatives include:
- “Tell me about your picture.”
- “Which part do you want to color next?”
- “Would a larger crayon make this easier?”
- “You can take your time.”
- “It’s okay if some color goes outside.”
- “Would you like a simpler page?”
- “I noticed you used several different colors.”
- “You worked carefully on that section.”
The difference lies not only in the words but also in maintaining a calm and supportive tone.
Should Parents Erase Coloring Outside the Lines?
Usually, no.
Erasing may suggest that the child’s work must be corrected to be acceptable. It can also damage the paper or cause frustration.
If the child personally wants to erase or fix an area, help them gently. Otherwise, leave the picture as it is.
Markers and crayons often cannot be erased, which teaches that creative work does not need to be perfect to be finished.
Should Children Use Coloring Pages or Blank Paper?
Both are useful.
Coloring pages can help children practice:
- Following outlines
- Working within spaces
- Recognizing familiar objects
- Completing a structured activity
- Using several colors in one picture
Blank paper can encourage:
- Free drawing
- Imagination
- Experimenting with lines
- Creating original scenes
- Drawing without rules
A balanced creative routine should include both.
A child might color a printed dinosaur and then draw a volcano, trees, or another dinosaur around it.
How to Know When a Coloring Page Is Too Difficult
A page may be too difficult when the child:
- Refuses to begin
- Becomes frustrated quickly
- Cannot fit the crayon into the spaces
- Constantly asks for help
- Scribbles over the whole page after trying
- Says the picture is too hard
- Loses interest within a minute or two
Choose a simpler page with larger sections.
A difficult page should not be used to test ability. The goal is to provide a manageable challenge for the child.
How to Gradually Increase Difficulty
Once the child is comfortable with simple pages, gradually increase the challenge.
A useful progression is:
- One large shape
- One large object with a few details
- Two or three objects
- A simple background
- Medium-sized coloring areas
- Smaller details
- Patterns or more complex scenes
Progress to the next level based on the child’s interest and readiness, not just age.
You can also allow the child to choose between an easy and a more detailed version of the same subject.
Simple Activities That Improve Coloring Control
Draw Roads for Toy Cars
Make wide paths on paper and ask the child to move a toy car between the lines.
Trace Large Shapes
Use a finger, crayon, or washable marker to follow a circle, square, or wavy line.
Play With Modeling Clay
Rolling, squeezing, and shaping clay gives children another way to use their hands and fingers.
Use Stickers
Placing stickers inside large shapes requires visual attention and hand control.
Paint With Cotton Swabs
Dabbing paint into large sections can be easier than controlling a pencil.
Draw Inside Boxes
Make several large boxes and invite the child to create a different pattern in each one.
Connect Large Dots
Simple dot-to-dot pages help children practice moving from one point to another.
Use Chalk Outdoors
Large sidewalk drawings allow children to practice broad movements before working on smaller paper.
Coloring is not the only activity that helps children practice control.
A Simple Seven-Day Practice Plan
This plan is optional and should remain playful, not formal.
- Day 1: Free coloring. Let the child choose any page and color without instructions.
- Day 2: Large shapes. Color several large circles, hearts, or stars.
- Day 3: Practice short strokes. Demonstrate small back-and-forth movements on your own page.
- Day 4: Edge and middle. Color around the inside edge of a simple shape, then fill the center.
- Day 5: Coloring road. Pretend the crayon is driving beside the outline.
- Day 6: Favorite subject. Let the child choose a page based on a personal interest.
- Day 7: Color together. Print two similar pictures and color them side by side.
There is no need to complete all seven days. Repeat activities the child enjoys and skip those that cause frustration.
Frequently Asked Questions
Should a three-year-old be able to color inside the lines?
Some three-year-olds begin trying to follow large outlines, but frequent coloring outside the lines is normal. Choose simple pictures with thick borders and large spaces.
How can I improve my child’s control of coloring?
Use large, simple pages, comfortable crayons, short practice sessions, and small strokes. Demonstrate on your own paper instead of repeatedly correcting the child.
Is coloring outside the lines a problem?
Usually, no. Young children are still developing control. Focus on enjoyment and gradual progress rather than neatness.
Should I hold my child’s hand while they color?
It is usually better to demonstrate and let the child move independently. Holding the child’s hand can be used briefly when requested, but it should not replace independent practice.
Are markers easier than crayons?
Markers require less pressure and produce stronger colors, so some children find them easier to use. However, they can move quickly and may bleed through paper. Broad, washable markers are often suitable for beginners.
What kind of coloring pages are best for beginners?
Choose one large object, thick outlines, wide spaces, and very few details. Simple fruits, animals, vehicles, flowers, and basic shapes are good options.
What if my child refuses to color?
Do not force the activity. Offer drawing, painting, stickers, clay, chalk, crafts, or another hands-on activity. Not every child enjoys coloring.
Should I praise the finished picture?
Yes, but focus on the child’s effort and choices. Comments like “You worked carefully on this section” are often more meaningful than simply saying “Perfect.”
Final Thoughts
Teaching a child to color inside the lines should not focus on creating a perfect picture.
This skill develops through many small experiences, such as holding crayons, noticing edges, slowing down, choosing manageable pages, and practicing hand control.
Parents can best support their child by creating the right conditions: choosing simple images, providing comfortable tools, demonstrating gently, and avoiding too much correction.
Some days, a child may color carefully; on others, they may fill the page with quick, energetic scribbles. Both are part of the learning process.
The goal is not to keep every color inside the lines, but to help the child feel comfortable, capable, and interested in creating art.